How To Create Mockup Images In Bulk In Photoshop: Automate This Boring Work and Save TONS of Time
Overview: This guide shows how to automate the process of generating Photoshop mockup images at scale so you no longer have to replace smart objects and export files one by one. We’ll walk through how the Batch-Replace Smart Objects plugin for Photoshop works and how to configure bulk mockup operations that automatically insert artwork into PSD templates and export finished images on autopilot. The result is completely automated mockup image creation — where hundreds (or thousands) of mockup images are generated for you — so you can focus on higher-value creative work instead of wasting hours of time doing boring, repetitive file processing.
How This Tool Works (High-Level Overview)
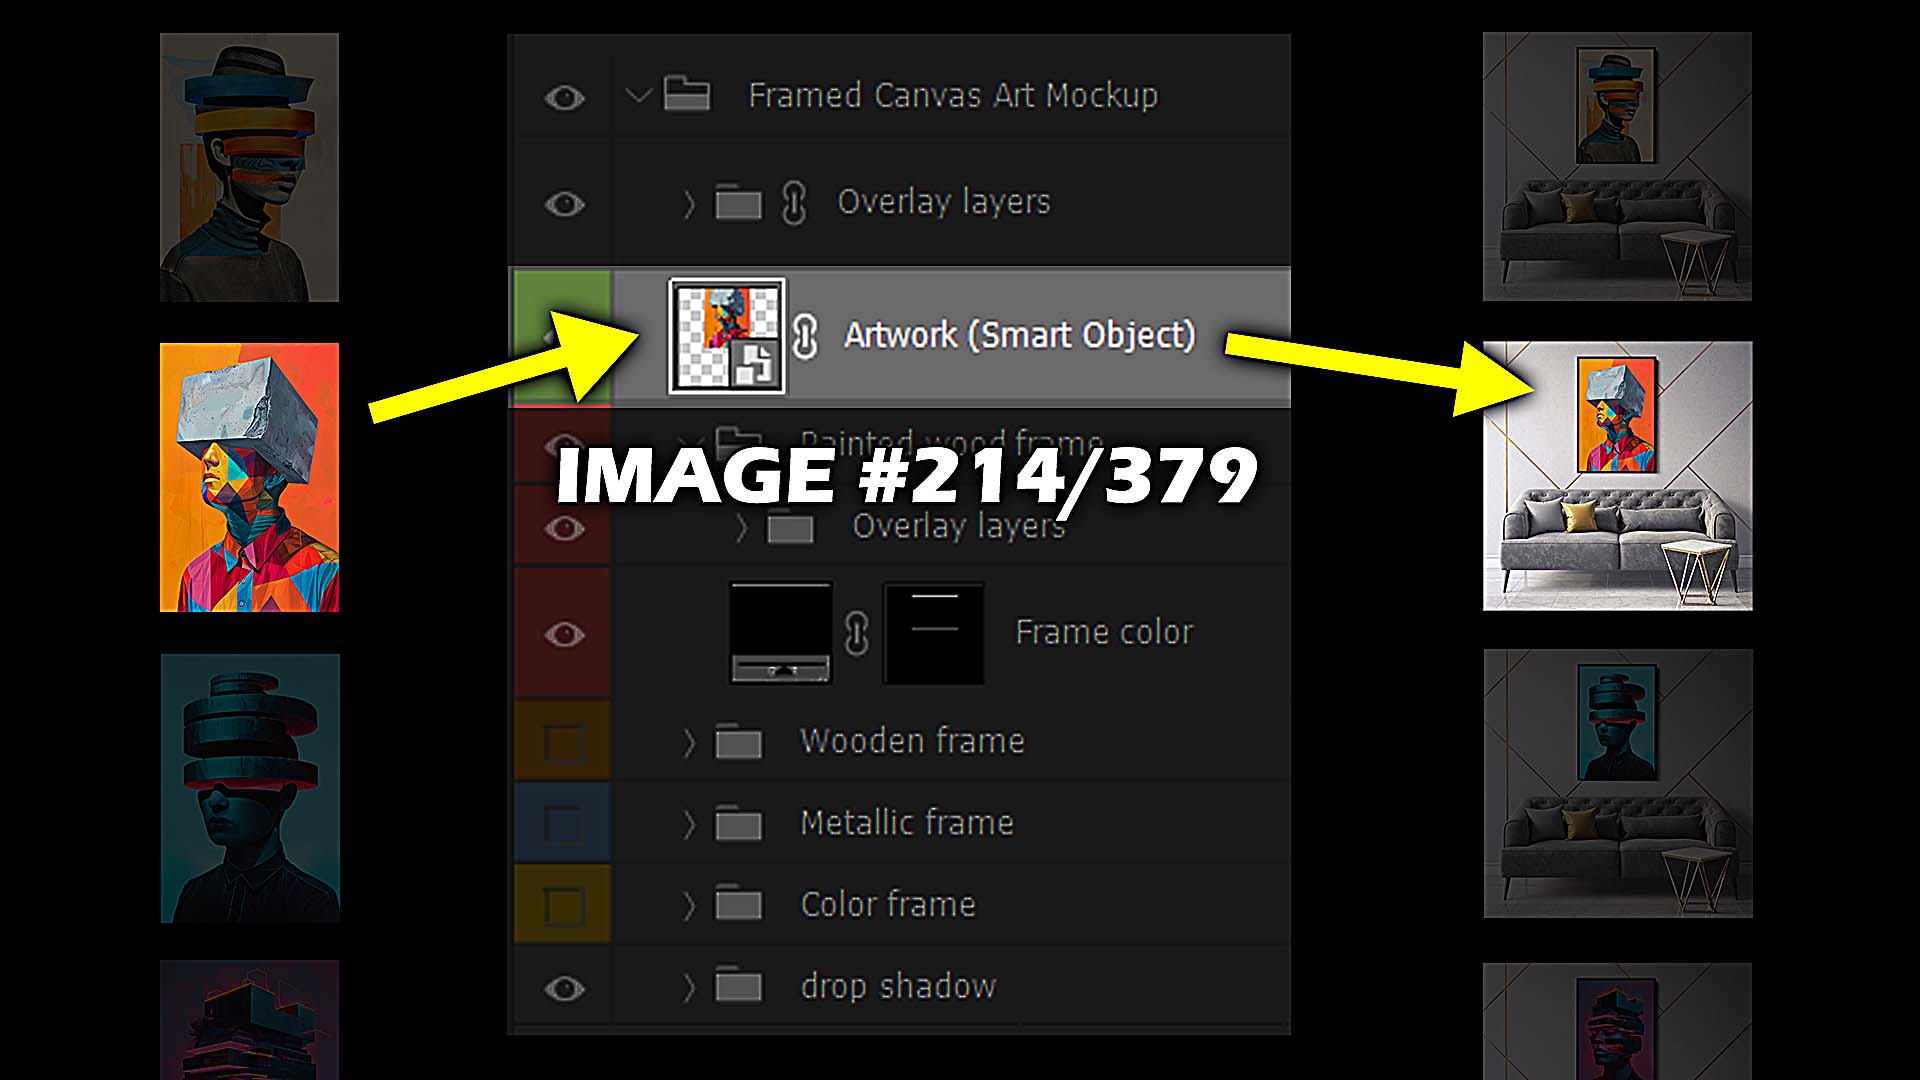
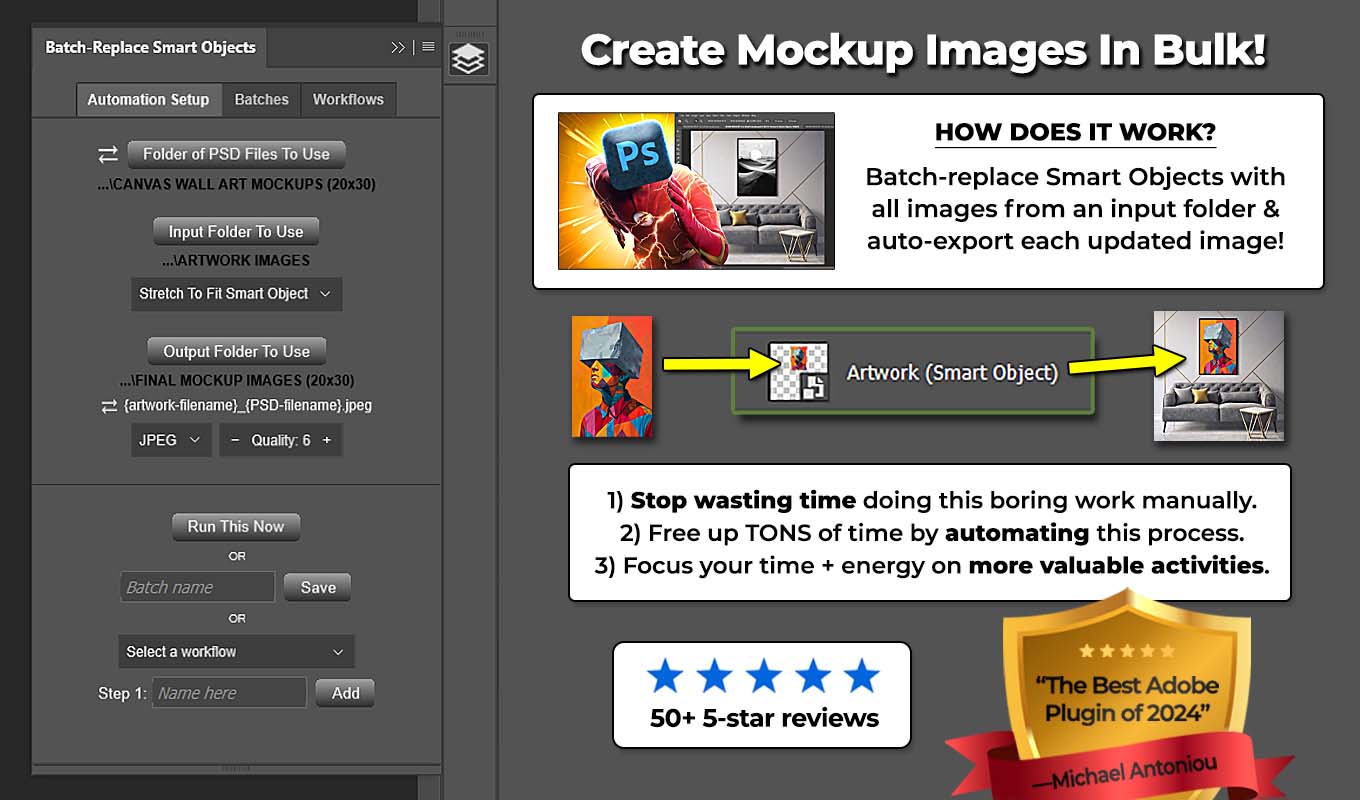
At its core, the Batch-Replace Smart Objects plugin automates one specific Photoshop task: replacing Smart Object contents inside PSD/PSB files and exporting the resulting mockup images. Instead of doing this manually one image at a time, the plugin performs the entire process automatically using folders of artwork images and mockup templates—while also applying customizable placement, resizing, alignment, and export rules to ensure consistent, high-quality results.
Here’s the basic idea behind how the system works.
First, you provide the plugin with one or more PSD/PSB mockup templates. These templates contain the Smart Object layers where your artwork will appear inside the mockup scene—such as a canvas on a wall, a framed poster, a T-shirt design, a product package, or any other visual presentation. These Smart Objects effectively act as the “placement zones” that define how your designs will appear across every generated mockup.
Next, you select an input folder containing your artwork or design images. These are the images you want inserted into the Smart Object layers of your mockup templates. The plugin supports a wide range of image filetypes—including JPEG, PNG, WEBP, TIFF, PDF, GIF, PSD, PSB, AI, EPS, and SVG—allowing you to work with everything from simple flattened graphics to complex layered compositions, while preserving transparency where applicable.
You also choose an output folder, which is where the finished mockup images will be exported after the plugin processes them. During this step, you can define your export format (such as JPEG, PNG, WEBP, TIFF, PDF, GIF, PSD, or PSB), as well as control compression and quality settings to balance file size and visual fidelity.
Before running the operation, you can also define how your artwork should be placed inside the Smart Object using placement and resizing rules. These include options like stretching images to match the Smart Object dimensions exactly, preserving aspect ratio and fitting inside the print area, or filling the entire area and cropping excess. You can further refine positioning using vertical and horizontal alignment controls (Top, Center, Bottom and Left, Center, Right), ensuring consistent placement across every generated mockup.
Once the operation runs, the Batch-Replace Smart Objects plugin automatically performs the following steps:
- Opens the selected PSD/PSB mockup file (or mockup templates).
- Inserts each artwork image into the Smart Object layer.
- Applies your defined placement, resizing, and alignment rules.
- Updates the mockup scene with the new design.
- Exports the finished mockup image to the output folder using your selected file type and quality settings.
- Moves to the next artwork image in the folder.
- Repeats the process automatically until every image has been processed.
If you’re using multiple PSD/PSB mockup templates—such as different product scenes or visual variations—the plugin will cycle through those templates as well, generating mockups for every combination of artwork and template. This allows you to scale your workflow across entire product catalogs or design libraries without additional manual effort.
For example:
- 10 artwork images
- 10 PSD mockup templates
This would generate 1000 finished mockup images automatically, without any manual editing.
What would normally take hours of repetitive Photoshop work becomes a simple automated operation that runs in the background while you focus on more important tasks. And once your setup is dialed in, you can even save these operations and reuse them later—or chain multiple operations together into larger workflows—allowing you to automate your entire mockup creation pipeline with a single click.

How To Set Up & Run Automated Bulk Mockup-Creation Operations
Now that you understand the basic concept, let’s walk through how to actually configure and run a mockup-creation operation inside the plugin interface.
The setup process is intentionally simple. The plugin is designed so you can define your inputs once, configure your placement and export settings, and then let Photoshop handle the entire operation automatically.
In most cases, the full setup takes less than a minute.
Below is a step-by-step breakdown of the operation builder and how each setting works.
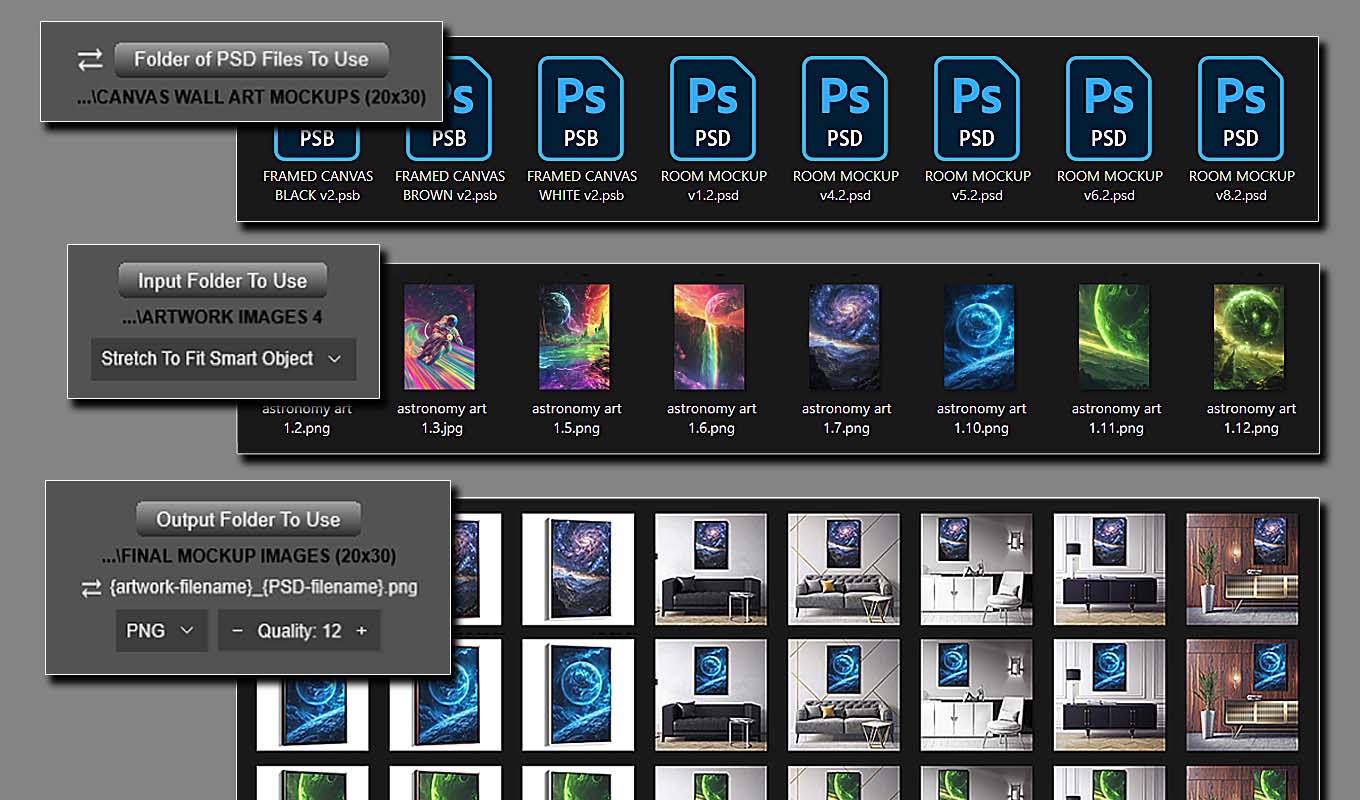
Step 1: Select the PSD/PSB Mockup Template (or Folder of Templates)
The first thing you’ll choose is which Photoshop mockup file(s) you want the plugin to use.
You have two options here.
Option 1: Use a Single PSD or PSB File
If you only have one mockup template, simply select the PSD or PSB file.
Both formats are fully supported, so you can work with standard Photoshop documents (PSD) or large-format files (PSB) depending on your workflow.
For example:
- A framed poster mockup
- A canvas mockup
- A T-shirt product scene
- A product packaging mockup
The plugin will use this single PSD or PSB file and generate mockups for every artwork image in your input folder.
So if your input folder contains 40 artwork files, the plugin will generate 40 finished mockups automatically.
Option 2: Use a Folder of PSD/PSB Mockup Templates
If you want to generate multiple mockup variations (for example different scenes, frame colors, or product variants), you can instead select an entire folder of PSD and/or PSB files.
In this case, the plugin will process each mockup template sequentially.
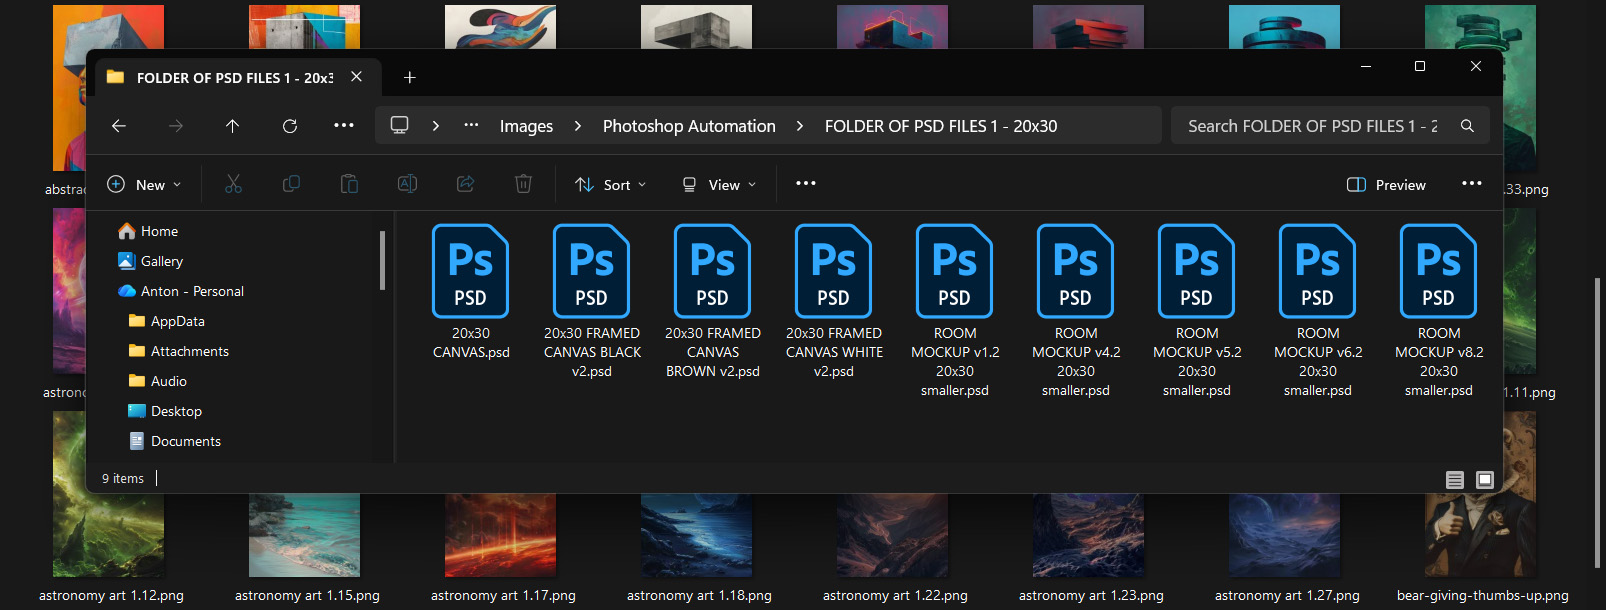
Example:
- 9 PSD/PSB mockup templates
- 100 artwork images
The plugin will generate:
9 × 100 = 900 mockup images
Each artwork image will be inserted into every mockup template automatically.
This mode is extremely useful when creating:
- product variants
- multiple lifestyle scenes
- different color frames
- alternate product presentations
Instead of manually running each PSD or PSB file individually, the plugin handles everything in one operation.
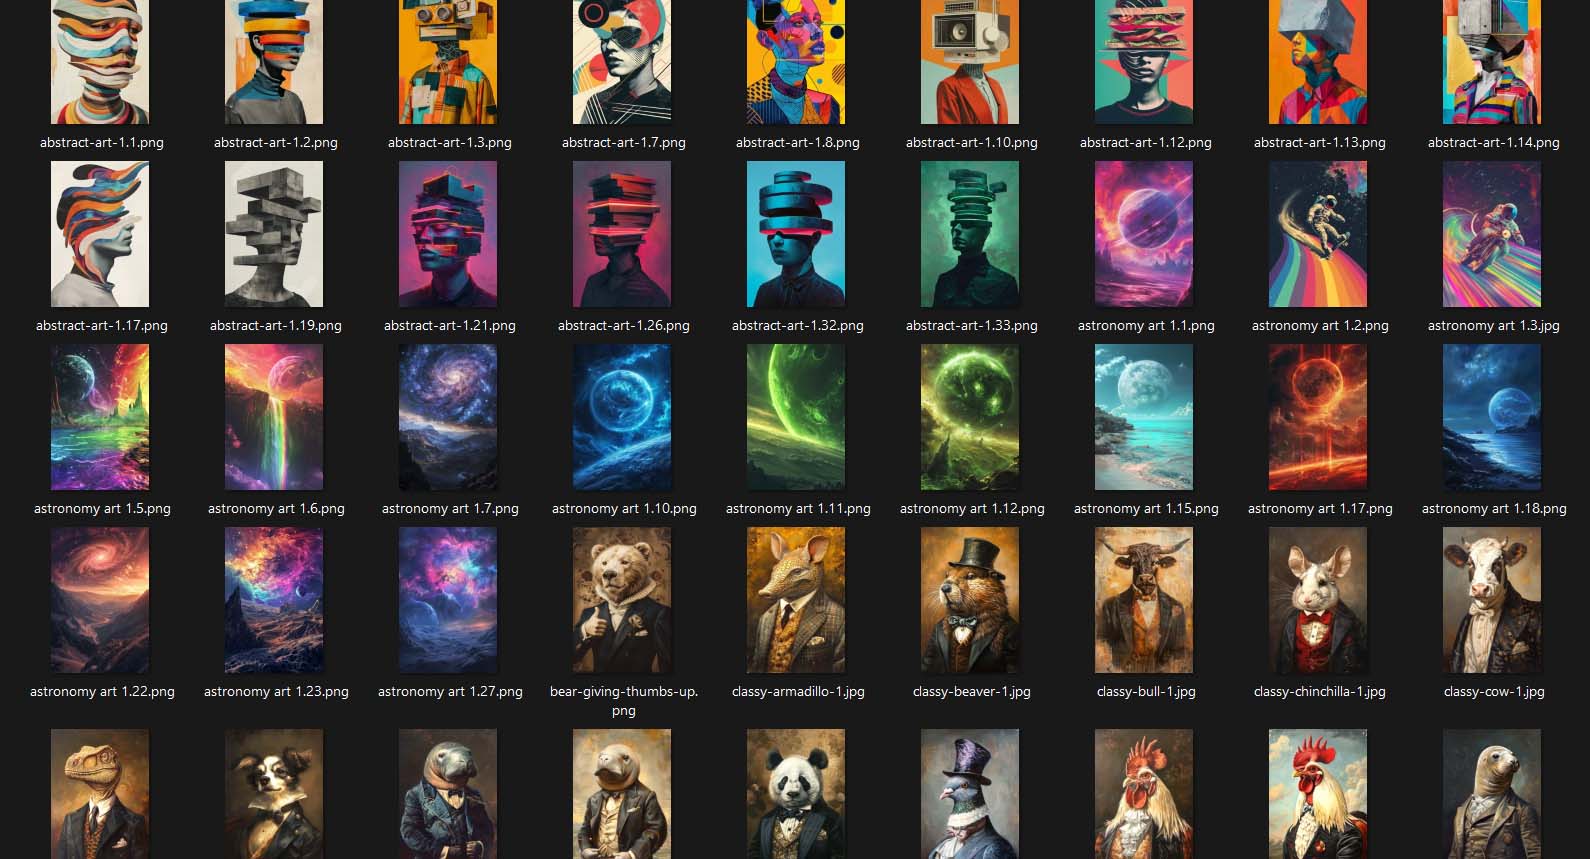
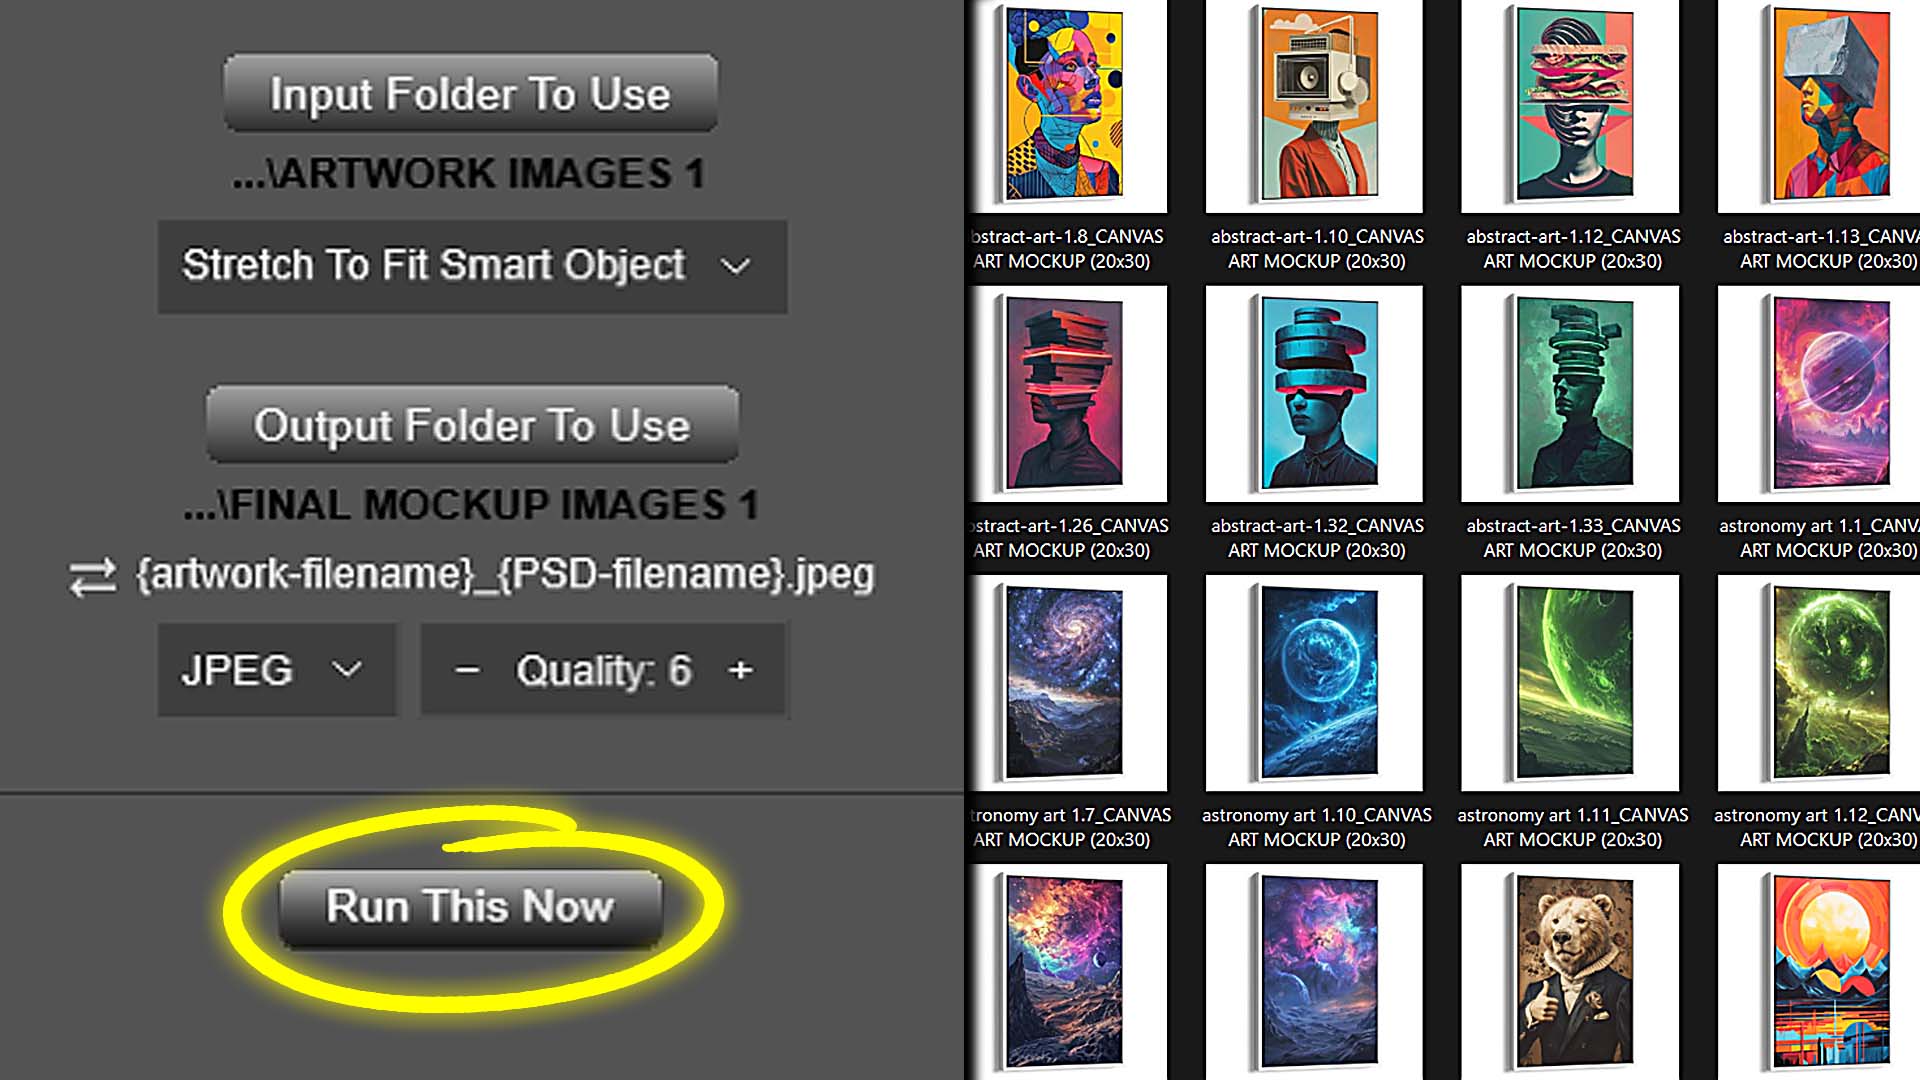
Step 2: Select the Input Folder (Your Artwork Images)
Next, you’ll select the input folder containing your artwork or design images.
This folder contains the images that will be inserted into the Smart Objects inside your PSD mockups.
Supported input formats include:
- JPEG
- PNG
- WEBP
- TIFF
- GIF
- PSD
- PSB
- AI
- EPS
- SVG
Each image inside this folder will be processed one by one during the operation.
For example, if your folder contains:
artwork_01.pngartwork_02.pngartwork_03.png
The plugin will take each image and place it into the mockup Smart Object layer sequentially.
This continues automatically until every image in the folder has been processed.
Step 3: Choose the Output Folder
Next, you’ll choose where the finished mockup images should be exported.
This is your output folder.
Every time the plugin generates a finished mockup image, it will automatically export the file to this location using your selected export format and quality settings.
Keeping a dedicated output folder helps keep your workflow organized, especially when you’re generating large batches of mockups.
In addition to controlling where files are saved, the plugin also applies a structured filenaming system automatically. Each exported image combines the artwork filename with the PSD mockup filename, giving you clear, descriptive filenames without any manual effort.
You can also control the ordering of these elements, allowing you to organize your files exactly how you want:
artwork-name_mockup-name.jpgmockup-name_artwork-name.jpg
This has several practical benefits:
- Organization: Files are grouped and sorted in a predictable way
- Workflow speed: No need to manually rename files before uploading or sharing
- SEO: Descriptive filenames provide additional context for search engines and image indexing
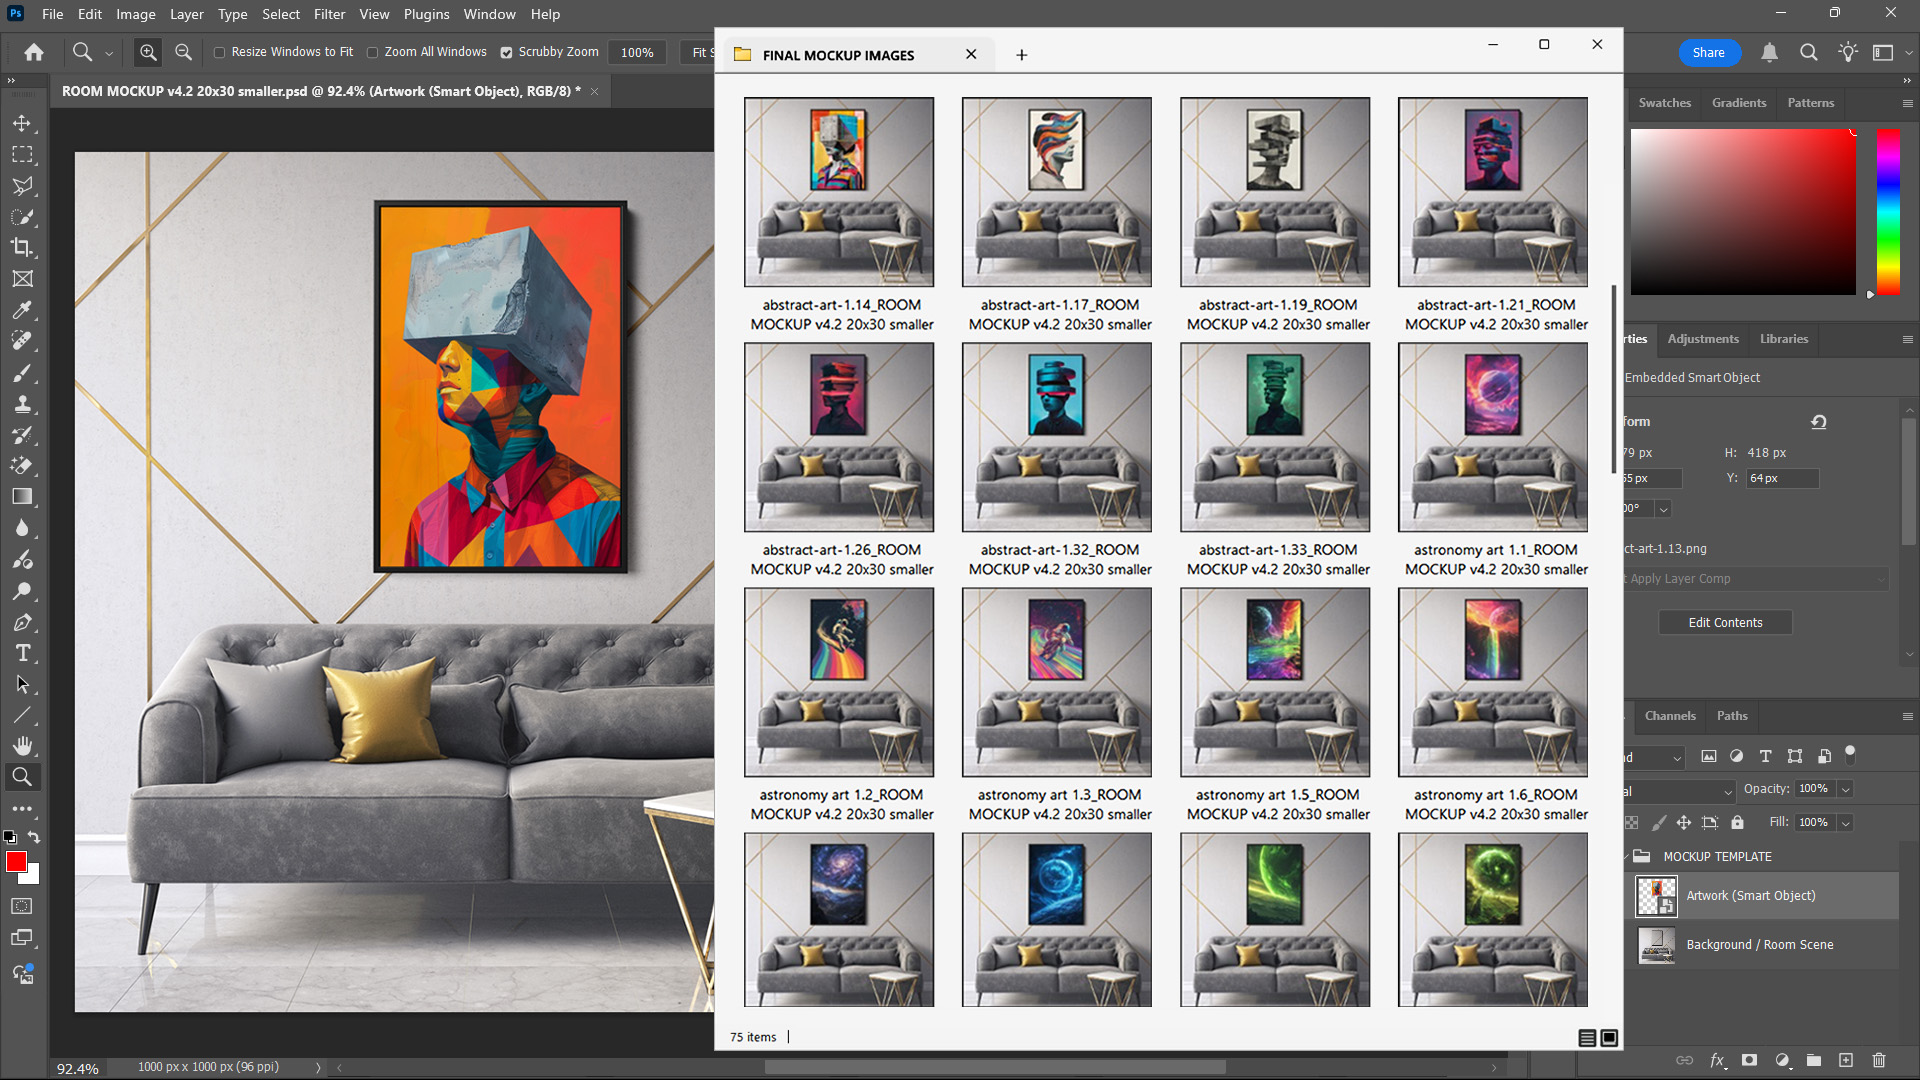
For example, after running an operation you might open your output folder and see something like:
artwork_01_room_mockup.jpgartwork_01_frame_mockup.jpgartwork_02_room_mockup.jpgartwork_02_frame_mockup.jpg
All the images are automatically generated, consistently named, and neatly grouped together.
Step 4: Configure Artwork Placement, Resizing, and Alignment
This is one of the most important parts of the setup process.
Instead of manually resizing and positioning each image, you define rules that apply to every mockup automatically.
The plugin provides four placement modes:
- Stretch To Fit Smart Object — Resize images to exactly match the Smart Object dimensions and DPI.
- Place Original Image — Insert images exactly as-is with no resizing.
- Contain Inside Smart Object — Preserve aspect ratio while fitting inside the Smart Object boundaries.
- Fill Smart Object & Crop — Fill the entire Smart Object area and crop any excess.
You can also define alignment rules:
- Vertical: Top / Center / Bottom
- Horizontal: Left / Center / Right
These settings ensure that every generated mockup is consistent, properly scaled, and positioned exactly how you want.
Instead of manually adjusting each image, the plugin applies these rules automatically across the entire batch.
Step 5: Choose Export File Type and Image Quality
Next, you’ll configure the export settings for the finished mockup images.
You can choose from multiple export formats:
- JPEG
- PNG
- WEBP
- TIFF
- GIF
- PSD
- PSB
You can also control compression and quality levels (0–12), allowing you to balance file size and image detail.
For example:
- JPEG / WEBP → smaller files, ideal for web and ecommerce
- PNG → preserves transparency
- PSD / PSB → preserves layers for further editing
- TIFF / PDF → useful for print workflows
Your choice depends on how the mockups will be used, but the flexibility allows you to tailor outputs for any workflow.
Step 6: Click “Run This Now”
Once everything is configured, you simply click:
Run This Now
At that point, the plugin takes over and runs the entire operation automatically.
Here’s what happens behind the scenes.
What Happens After You Click Run
Once the operation begins, the plugin executes the following sequence automatically:
- Opens the first PSD mockup template.
- Loads the first artwork image from the input folder.
- Inserts the artwork into the Smart Object layer.
- Applies placement, resizing, and alignment rules.
- Updates the mockup scene.
- Exports the finished mockup image to the output folder.
- Loads the next artwork image.
- Repeats the process.
If you selected a folder of PSD templates, the plugin will repeat this entire process for each template as well.
The workflow becomes:
PSD Template 1
            → Artwork Image 1
            → Artwork Image 2
            → Artwork Image 3
            → Export results

            PSD Template 2
            → Artwork Image 1
            → Artwork Image 2
            → Artwork Image 3
            → Export results
And this continues until every artwork image has been combined with every mockup template.
All of this runs automatically with no manual editing required.
Fully Automated Mockup Generation
The result is a fully automated Photoshop workflow.
Instead of manually:
- opening PSD files
- editing Smart Objects
- resizing images
- exporting mockups
- naming files
…the plugin handles the entire process for you.
What would normally require hundreds of repetitive Photoshop actions becomes a simple automated operation that runs in the background.
Once the operation finishes, you’ll have a full set of finished mockups waiting in your output folder—ready for uploading, sharing with clients, or publishing online.
In the next section, we’ll look at how you can save these operations and run them later with a single click, making the process even faster for recurring workflows.
Save Operations to Run Later With One Click
One of the most useful features of the Batch-Replace Smart Objects plugin is the ability to save your operation setup and run it again later with a single click.
In the previous section, we walked through how to configure a mockup-generation operation by selecting:
- your PSD mockup template (or folder of PSD templates)
- your input folder containing artwork images
- your output folder for the finished mockups
- export settings such as file format and image quality
Once everything is configured, you normally have the option to click “Run This Now” and process the operation immediately.
However, there’s another option that can make your workflow even faster.
Instead of running the operation right away, you can save the operation as a reusable batch preset.
Saving a Mockup Operation
After configuring your operation in the plugin interface, you can assign the operation a name and save it.
For example, you might save an operation called:
- Canvas Wall Art Mockups
- Framed Poster Mockups
- Client A Product Mockups
The plugin will store all of the operation settings exactly as configured, including:
- the PSD mockup file or PSD folder
- the artwork input folder
- the export output folder
- the export file type
- image quality settings
- smart object resizing/placement/alignment options
Once saved, the operation appears inside the Batches tab of the plugin.
Running Saved Operations From the Batches Tab
When you want to generate mockups again using the same setup, you don’t need to rebuild the operation from scratch.
Instead, you simply open the Batches tab, locate your saved operation, and click:
Run Batch
The plugin will immediately execute the saved operation using all of your stored settings.
No reconfiguration required.
Why This Feature Saves So Much Time
For many workflows, the same setup gets used repeatedly.
For example, you might always:
- use the same PSD mockup templates
- place artwork images into the same input folder
- export finished mockups to the same output folder
Without saved operations, you would need to manually configure the operation builder every time.
But with saved batches, the entire setup process disappears.
Instead of spending time reconfiguring settings, you simply:
- Place your new artwork images into the input folder
- Open the Batches tab
- Click Run Batch
That’s it.
The plugin runs the entire process automatically.
For anyone who regularly creates mockups at scale, this feature alone can save a significant amount of time on top of the already massive time savings provided by the automation itself.
Chain Together Multiple Saved Operations as Automated Workflows
While saved batch operations are extremely useful, the plugin includes an even more powerful feature designed for advanced automation.
This feature is called Workflows.
Instead of saving just one operation at a time, workflows allow you to chain together multiple operations and run them all automatically in sequence.
What Is a Workflow?
A workflow is essentially a series of saved operations that execute one after another automatically.
Each operation in the workflow becomes a step.
For example:
- Step 1 — Create framed canvas mockups
- Step 2 — Create lifestyle room mockups
- Step 3 — Create gallery wall mockups
Each step stores its own settings independently.
Building a Workflow
Creating a workflow works similarly to saving a normal batch operation.
First, configure the operation in the operation builder interface at the top of the plugin.
Then save that operation as Step 1 of the workflow.
Next, configure a different operation setup and save that as Step 2.
You can repeat this process for as many steps as needed.
Each step can have completely different settings.
For example:
- different PSD files
- different PSD folders
- different artwork input folders
- different output folders
- different export formats
- different compression levels
- different smart object resize/placement settings
There are no restrictions requiring each step to match the others.
Every step simply runs with the configuration saved for that step.
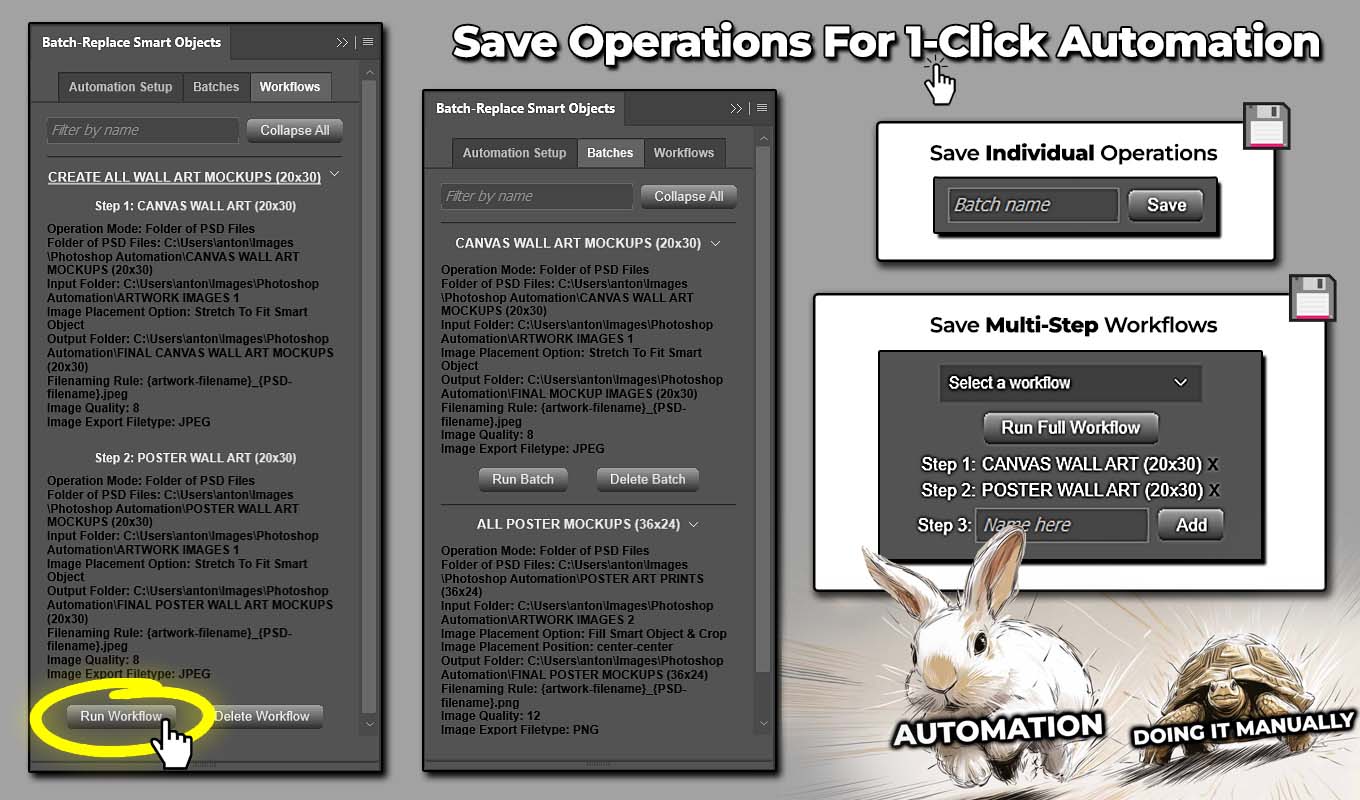
Running the Entire Workflow With One Click
Once your workflow is configured, it appears in the Workflows tab of the plugin.
When you want to run the entire process, you simply click:
Run Workflow
The plugin will then automatically execute every step in the sequence.
Step 1 runs first.
When it finishes, Step 2 begins automatically.
Then Step 3.
And so on.
All operations run completely automatically with zero manual intervention required.
Fully Automated Mockup Production
Workflows are especially powerful when generating multiple types of mockups for the same artwork.
For example, imagine you want to generate:
- framed canvas mockups
- unframed canvas mockups
- lifestyle room scenes
- product listing images
Normally, this would require multiple manual operations.
But with workflows, you simply define each operation once, save the steps, and run the entire sequence with a single button click.
The plugin then executes the entire mockup production pipeline on autopilot.
Maximum Time Savings
When you combine:
- automated smart object replacement
- saved batch operations
- chained workflows
…the result is an incredibly efficient Photoshop automation system.
Instead of spending hours performing repetitive editing tasks, you can generate entire libraries of mockup images with just a few clicks.
Can This Plugin Handle Artwork Images or Mockup Scenes With Transparency?
Yes — the plugin fully supports transparency.
This is especially important for many real-world design workflows where artwork images or mockup scenes contain transparent areas. For example:
- logo designs with transparent backgrounds
- text overlays placed onto product mockups
- graphics that need to float above a background scene
- layered product compositions
If your input artwork images contain transparency, the plugin will preserve that transparency when inserting the artwork into the Smart Object. This behavior is consistent across all supported filetypes that include alpha channels or transparency data.
Using Transparent Artwork Images
Transparency is most commonly associated with PNG image files, but the plugin is not limited to PNG alone. It also supports transparency in other formats such as PSD, PSB, TIFF, and certain vector-based formats where applicable.
For example, imagine you have a logo design saved as:
logo_design.png
The logo itself contains visible pixels, but the surrounding area is transparent.
When the plugin inserts that image into a mockup Smart Object, the transparent regions remain transparent. The mockup scene underneath will still show through correctly, just as it would if you manually placed the image inside Photoshop.
This means:
- no background artifacts are introduced
- no flattening occurs during placement
- designs behave exactly as expected inside the mockup
No extra configuration is required. The plugin automatically respects transparency during the Smart Object replacement process.
Exporting Mockups With Transparency
Transparency can also exist in the final exported mockup image itself.
For example:
- product designs placed on transparent backgrounds
- floating design elements
- layered graphics intended for further editing
If your PSD mockup template contains transparent areas and you want the exported mockups to preserve that transparency, you can choose from several export formats that support it, including:
- PNG (most common for transparency)
- PSD / PSB (preserves full layer structure)
- TIFF (supports transparency and high-quality output)
PNG is typically the most practical choice for web and ecommerce use cases, as it supports alpha channels while maintaining broad compatibility.
JPEG, on the other hand, does not support transparency. If JPEG is selected, any transparent areas will be flattened against a solid background during export.
Transparency + Layer Preservation
In addition to preserving transparency, the plugin can also preserve layering when exporting to formats like PSD, PSB, or TIFF.
This is especially useful when:
- you want to continue editing mockups after export
- you need non-destructive workflows
- you’re delivering layered files to clients
This ensures that your automation workflow does not come at the cost of flexibility or editability.
Quick Summary
To preserve transparency throughout your workflow:
- Use artwork files that support transparency (PNG, PSD, TIFF, etc.).
- Select an export format that supports transparency (PNG, PSD, PSB, or TIFF).
When these conditions are met, the plugin will automatically maintain transparency and layering throughout the entire operation—from input image to final exported mockup.
No manual adjustments are required.
How Does the Plugin Know Which Smart Object(s) to Replace?
Another common question users have is how the plugin determines which smart object layer inside the PSD file should be replaced during the operation.
The answer depends on how many smart objects exist in the mockup template.
Scenario 1: PSD Files With a Single Smart Object
If the PSD mockup template contains only one smart object layer, the plugin automatically detects and uses that smart object.
There are no special naming rules or rigid layer structure requirements.
You don’t need to rename the layer or follow any specific conventions.
The plugin simply detects that there is only one smart object available and uses it as the replacement target.
This makes setup extremely simple for most mockup templates.
Scenario 2: PSD Files With Multiple Smart Objects
Some PSD mockup scenes contain multiple smart object layers.
Examples include:
- business card mockups showing front and back views
- product scenes displaying multiple angles
- layouts where the same design appears on multiple surfaces
In these cases, the plugin cannot automatically guess which smart object you want to replace.
Instead, you simply select the desired smart object layer(s) manually inside the Photoshop Layers panel before running the operation.
Selecting One Smart Object
If you only want to replace a single smart object:
- Open the PSD mockup file.
- In the Layers panel, click the smart object layer you want the plugin to update.
When the operation runs, the plugin will use that selected layer as the replacement target.
Selecting Multiple Smart Objects
In some situations, you may want the same artwork image inserted into multiple smart objects at the same time.
For example:
- front and back of a business card
- multiple product surfaces in a single mockup
- repeating logo placements in a scene
You can do this by selecting multiple smart objects.
Simply hold down Ctrl (or Cmd on Mac) and click each smart object layer you want to include.
The plugin will then replace all selected smart objects simultaneously during the operation.
One Important Limitation
When multiple smart objects are selected, the plugin inserts the same artwork image into all selected smart objects for that step of the operation.
For example:
Input folder images:
design_01.png
        design_02.png
        design_03.png
If two smart objects are selected, the operation will proceed like this:
- Insert
design_01into Smart Object A and Smart Object B - Export the mockup
- Insert
design_02into Smart Object A and Smart Object B - Export the mockup
- Insert
design_03into Smart Object A and Smart Object B - Export the mockup
What the plugin cannot do is map different artwork folders or different images to different smart objects simultaneously.
For example, it cannot perform operations like:
- replace Smart Object 1 with images from Folder A
- replace Smart Object 2 with images from Folder B
That type of complex mapping would require a much more complicated automation system.
Instead, the plugin focuses on the most common and useful workflow: replacing selected smart objects with the same artwork image during each step of the operation.
Simple Setup, Flexible Control
This approach keeps the system both simple and flexible.
- If your mockup has one smart object → the plugin handles it automatically.
- If your mockup has multiple smart objects → you simply select the layers you want to update.
Either way, the process remains fast, predictable, and easy to configure for bulk mockup automation.
Creating Mockups Manually, One at a Time, Is a Gigantic Boring Waste of Time
If you’ve ever created mockups manually in Photoshop, you already know how painfully repetitive the process can be.
The typical workflow looks something like this:
- Open your PSD mockup template.
- Double-click the smart object layer.
- Step into the smart object document.
- Open the artwork image you want to insert.
- Drag or paste the artwork into the smart object.
- Resize and reposition the image so it fits correctly.
- Save the smart object.
- Return to the main PSD mockup scene.
- Export the finished mockup image.
- Choose export settings.
- Assign the file a name.
And after doing all of that work…
You’ve created exactly one mockup image.
Now imagine repeating that process 50 times.
Or 200 times.
Or 1,000 times.
Suddenly what seemed like a small task becomes an exhausting grind of opening files, resizing layers, exporting images, and typing filenames over and over again.
Even if each mockup only takes 30 seconds to create manually, producing 1,000 mockups would require over eight hours of nonstop repetitive clicking inside Photoshop.

That’s an entire workday spent doing nothing but mechanical file processing.
And this is precisely the kind of task that automation tools are designed to eliminate.
With the Batch-Replace Smart Objects plugin, all of that repetitive work disappears. Instead of manually replacing smart objects and exporting files one by one, the plugin performs the entire sequence automatically.
You simply configure your operation once, click Run, and let the automation handle everything.
How This Plugin Frees Up Your Time to Focus on Higher-Payoff Activities
The real value of automation isn’t just that it saves time.
It’s that it frees you from tedious mechanical work so you can spend your time on tasks that actually move your projects and business forward.
Different types of creators benefit from this in different ways.
Graphic Designers
For graphic designers, mockup creation is often just a presentation step in the larger design process.
The real value comes from:
- creating compelling visual concepts
- refining design compositions
- experimenting with typography and color palettes
- developing branding systems for clients
Spending hours manually exporting mockups adds no creative value to the project.
By automating the mockup generation process, designers can focus on the work that actually requires their expertise — design thinking, concept development, and creative exploration.
Photographers
Photographers often use mockups to present their work in:
- framed gallery scenes
- interior wall displays
- product packaging
- promotional graphics
But the core value of a photography business isn’t exporting mockup images.
It’s:
- planning shoots
- capturing great images
- editing and refining photographs
- marketing photography services
- building a client portfolio
Automating mockup generation means photographers spend less time doing repetitive Photoshop work and more time doing what they do best — creating great images and growing their brand.
Print-on-Demand Sellers
For print-on-demand sellers, mockups are critical because they are the primary product images customers see when browsing an online store.
But creating those images manually can quickly become a massive bottleneck.
A typical store might need mockups for:
- multiple artwork designs
- multiple product variants
- multiple lifestyle scenes
- multiple color options
That can easily turn into hundreds or thousands of images.
Without automation, sellers can waste huge amounts of time manually generating mockups instead of focusing on activities that actually grow their store.
Those activities include:
- designing new products
- researching trending niches
- improving product listings
- optimizing SEO and keywords
- launching marketing campaigns
Automating mockup creation removes a huge operational bottleneck, allowing sellers to scale their product catalog much faster.
Let Automation Handle the Boring Work
The reality is simple.
Replacing smart objects, resizing images, exporting files, and renaming mockups is not creative work.
It’s mechanical, repetitive busywork.
And those types of tasks are exactly where automation delivers the biggest productivity gains.
Instead of spending hours performing the same Photoshop actions over and over again, you can let the plugin handle the entire process automatically.
Set up the operation once.
Click a button.
And let Photoshop generate your mockups while you focus on the work that actually matters.
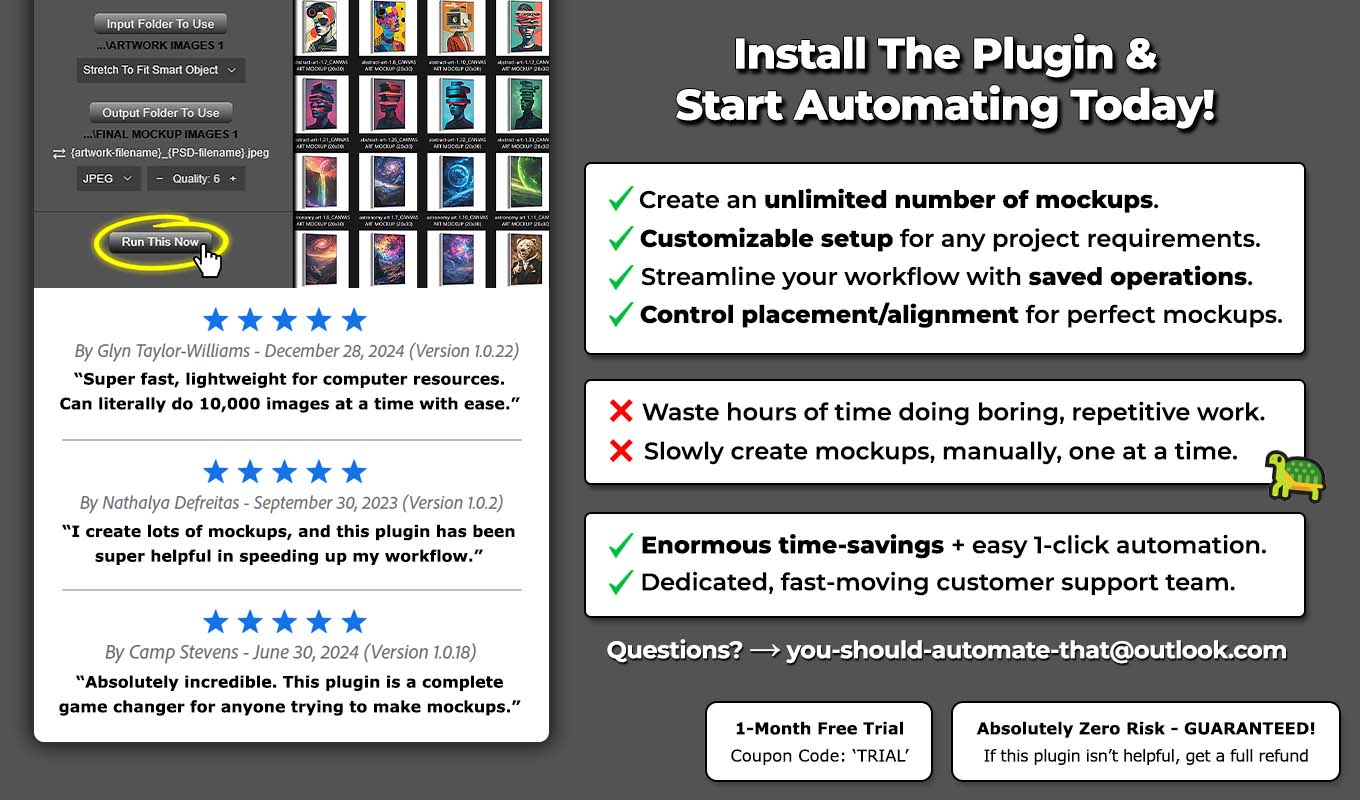
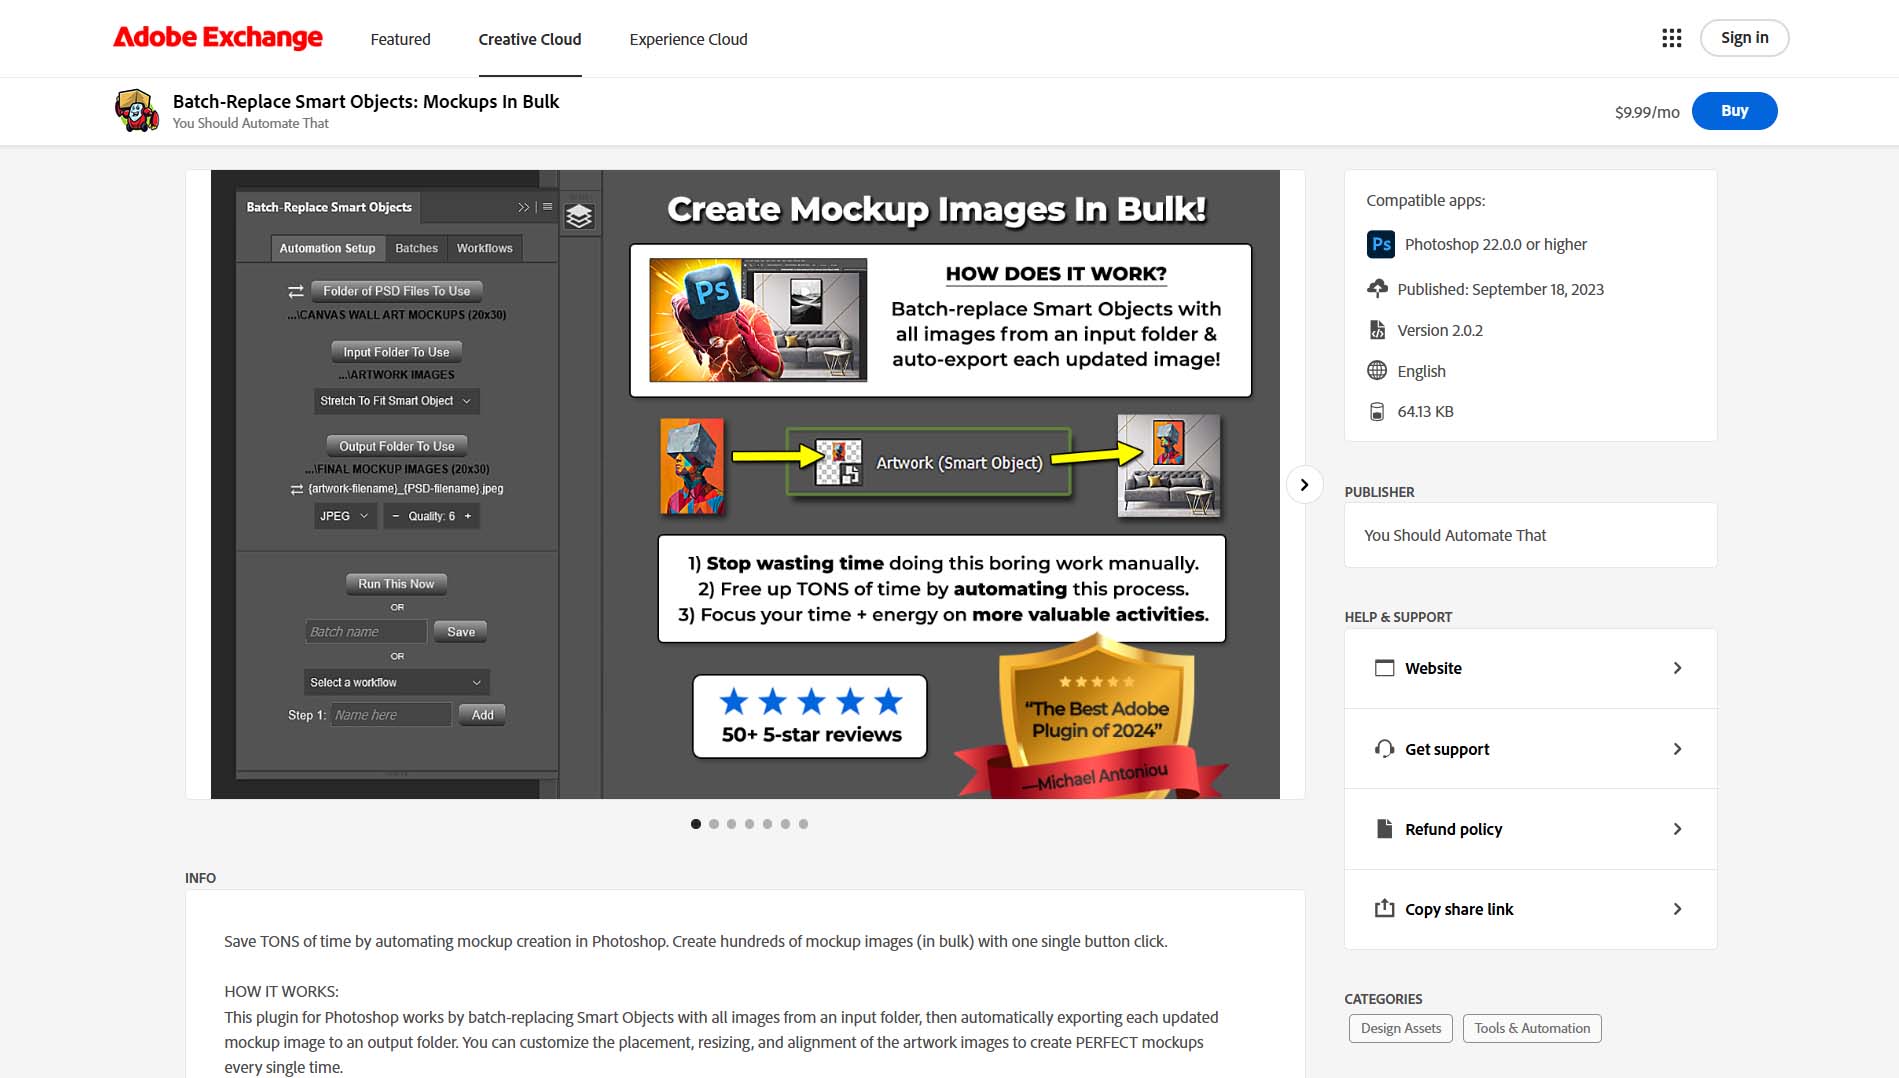
Install the Plugin From the Official Adobe Exchange & Start Automating Today
The Batch-Replace Smart Objects plugin is available directly through the official Adobe Exchange marketplace.
Adobe Exchange is the official distribution platform for Photoshop plugins and extensions, which means you can install the plugin with confidence. Adobe reviews all extensions before they are listed on the platform, ensuring they meet the company’s standards for functionality and security.
This makes it one of the safest and most reliable ways to install tools that extend Photoshop’s capabilities.
You can install the plugin here: https://exchange.adobe.com/apps/cc/8e3097ba
Once installed, the plugin will appear inside Photoshop where you can begin creating automated mockup workflows immediately.
Requirements
To use the plugin, you will need:
- An active Adobe Photoshop subscription
- Photoshop installed via Adobe Creative Cloud
After installing the plugin through Adobe Exchange, it integrates directly into Photoshop and is ready to use right away.
Start Saving Hours of Work
Creating mockups manually might be manageable for a few images, but once you start working at scale, it quickly becomes one of the most time-consuming parts of a design workflow.
By automating smart object replacement and mockup export inside Photoshop, the Batch-Replace Smart Objects plugin removes the most tedious parts of the process entirely.
Configure your operation once, click a button, and let the automation handle the rest.
If mockup creation is part of your regular workflow, installing this plugin can save you hours of repetitive work and dramatically speed up your production pipeline.